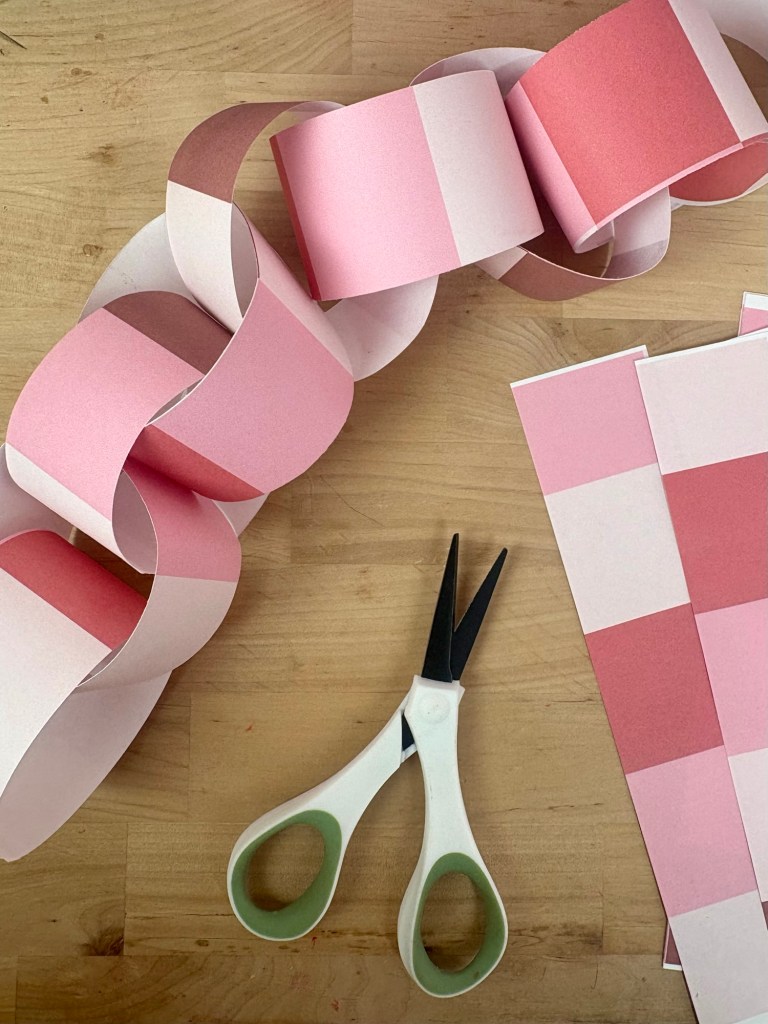
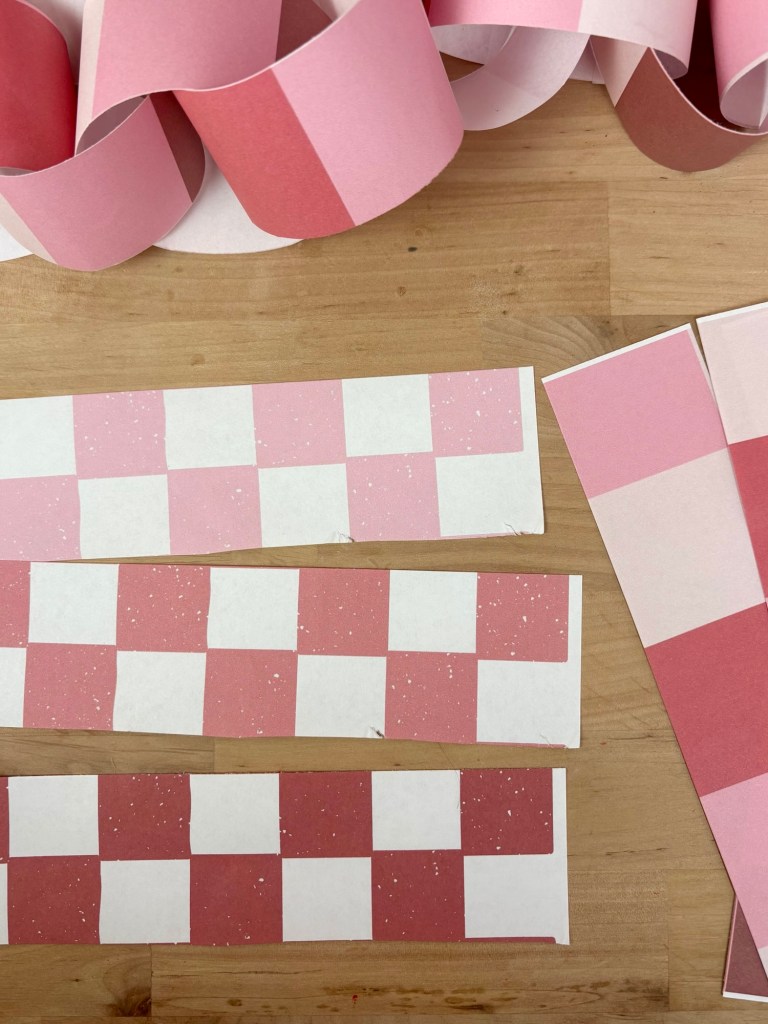
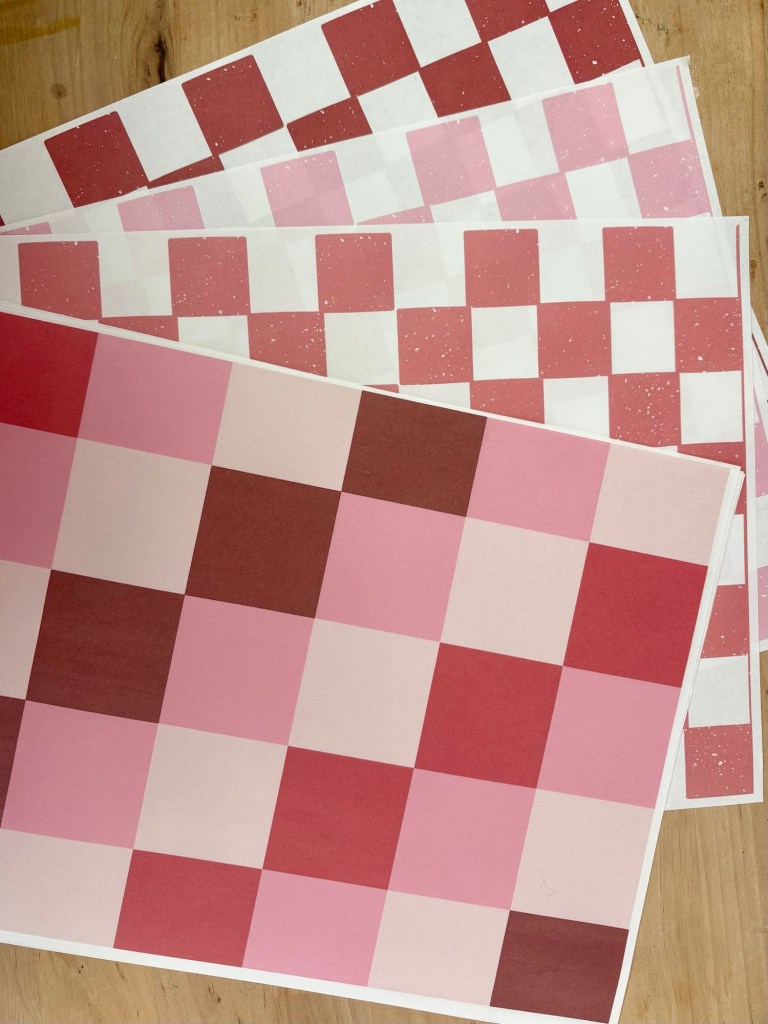
Printable paper chain strips for kids’ crafts and easy seasonal decor
Paper chains carry that warm, nostalgia. They remind us of childhood celebrations and kindergarten classrooms — and right now they’re having a moment again, popping up everywhere as a simple, joyful decor trend that feels both timeless and delightfully cozy.
It’s a great craft for kids because it’s easy to jump into and hard to mess up. You cut, stack, glue, and suddenly it looks like something—no special skills, no perfection required. It’s the kind of project kids can feel proud of without getting frustrated.
It also makes decorating easy and affordable. Once it’s finished, you can set it hang it and call it done. No bins to dig through, no complicated setup—just a simple, cheerful piece that adds a little fun without taking over your space.
Do you need a fun idea for a joint birthday party? Consider throwing a Carnival Birthday Bash.
Heads up! This post contains affiliate links. Thanks for your support!
PR products courtesy of Oriental Trading Co.
A carnival theme is a fantastic choice for a joint birthday party for several reasons:
Everyone Loves Carnivals
Seriously, who doesn’t love a carnival? It’s bright, fun, and perfect for both boys and girls.
Variety of Activities
You’ve got games, face painting, and maybe even a magic show. There’s something for everyone to enjoy!
Super Interactive
Everyone gets to join in on the fun! Games and activities get people talking and laughing—perfect for making new friends.
Epic Decor
Think colorful banners, balloons, and lights. It creates such a vibrant vibe that screams party!
Fun Food
Cotton candy, popcorn, and hot dogs? Yes, please! It’s the kind of food that makes you feel like a kid again. Carnival themed snacks are easy to make AND easy on the budget.
Endless Customization
You can mix in your favorite characters or themes. It’s totally flexible to fit both of your personalities.
Memorable Moments
The excitement of carnival games and activities creates lasting memories, making the celebration more special for both birthday kids.
Easy to Plan
Oriental Trading Co. has many ready-made carnival supplies and ideas available, so planning a carnival-themed party can be straightforward and fun.
Teamwork Makes the Dream Work
Group games and activities are perfect for getting everyone involved and building new friendships.
Perfect for Any Size
Whether you want a chill get-together or a huge party, a carnival theme can totally work for whatever you’re planning.
If you’re throwing a carnival-themed birthday party, Oriental Trading Company is the way to go. They offer tons of options, from decorations to games, all at affordable prices. And, with everything in one place, you can avoid the hassle of running around town. Overall, using Oriental Trading makes carnival party planning a breeze!🎪
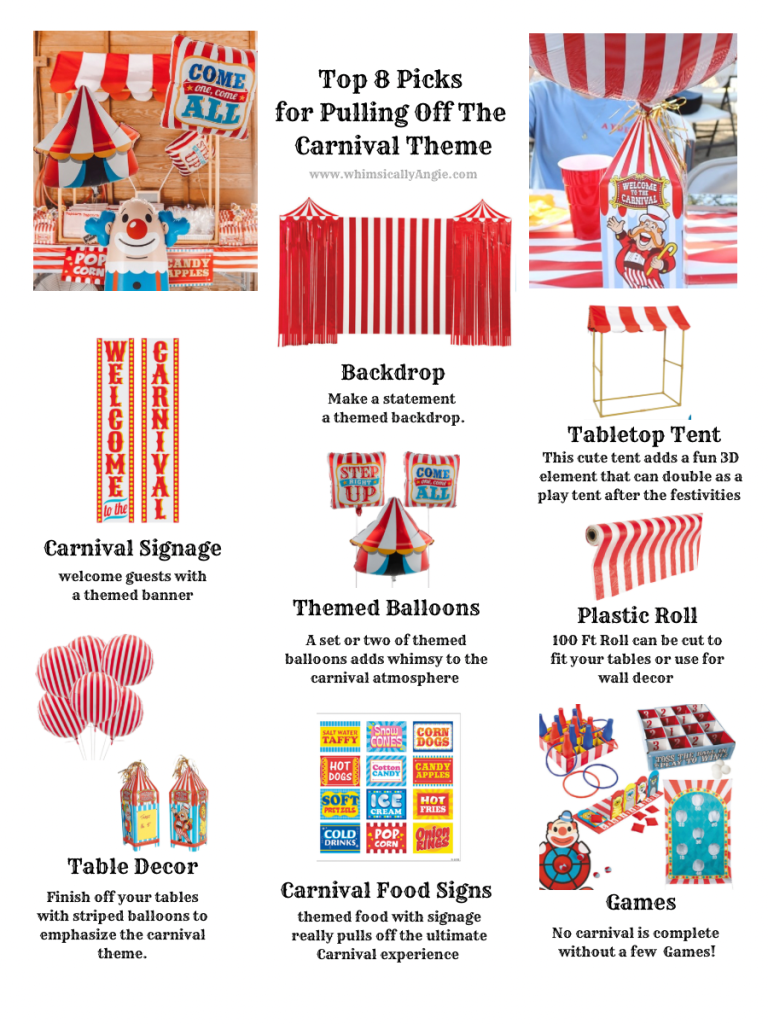
Planning the ultimate carnival birthday bash? You’re in the right place! From vibrant decorations to fun games and tasty treats, I’ve got you covered with 8 must-have picks that will transform your celebration into a festive wonderland. Whether you’re going for a classic carnival theme or something a bit more unique, these ideas will help create an unforgettable experience for kids and adults alike. Let’s dive into the top picks that will make your carnival birthday party a hit!
Heads up! This post contains affiliate links. Thanks for your support!
A themed carnival backdrop adds a fun, festive touch to your party! It creates an exciting atmosphere, perfect for photos and setting the mood. Plus, it instantly transforms your space, making it feel special and memorable for your guests. Who doesn’t love a bit of carnival magic?
This cute tent brings a fun 3D vibe to your party! It’s not just decoration; it can double as a play tent for the kids after the festivities. Perfect for sparking their imagination and keeping them entertained long after the party’s over.
A 100-foot roll is super versatile! You can easily cut it to fit your tables for a neat look or use it as wall decor to jazz up the space. It’s perfect for adding pops of color and fun patterns wherever you need it, making your party feel extra festive. Plus, it’s a budget-friendly way to elevate your decor game!
Finish off your tables with striped balloons to really bring that carnival theme to life! They add a fun pop of color and playfulness that ties everything together. It’s an easy and eye-catching way to enhance the theme and get everyone in a party mood!
Themed food with fun signage really takes your carnival experience to the next level! It not only makes the food look super tempting but also adds to the whole atmosphere. Think cotton candy, popcorn, and hot dogs with cute labels that fit the theme. It gets everyone excited and creates a memorable experience, making it feel like they’ve stepped right into a carnival!
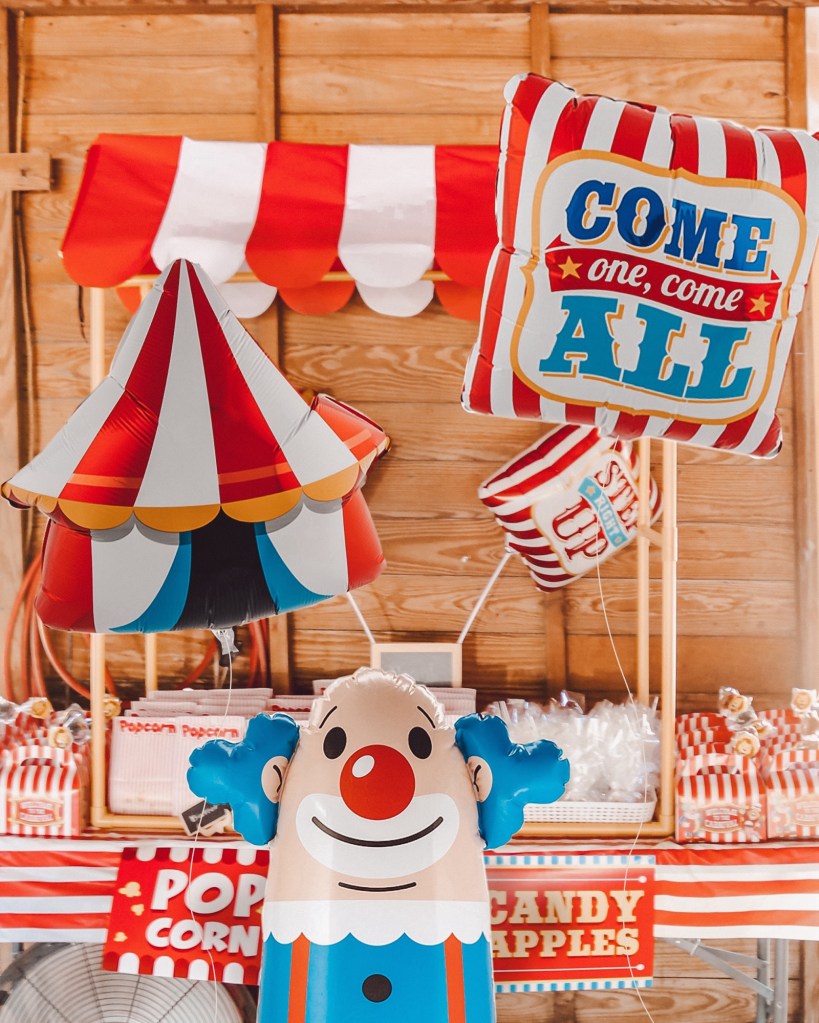
A set or two of themed balloons adds a playful touch to the carnival vibe! They’re bright, fun, and instantly lift the mood. Whether you go for classic shapes or quirky designs, balloons create that whimsical feel that makes your party feel festive. Plus, they’re great for filling up space and making everything look extra cheerful. Your guests will love the fun atmosphere they create!
No carnival is complete without a few games! They’re the heart of the fun, bringing everyone together and sparking some friendly competition. Whether it’s ring toss, bean bag toss, or a classic dart game, these activities keep the energy high and smiles wide. Plus, they’re a great way for guests to bond and create some awesome memories. Seriously, games are a must for that true carnival experience!
If you want to throw the ultimate carnival party, focus on fun details like a themed banner, cute tents, and whimsical balloons. Don’t forget delicious themed food and exciting games to keep everyone entertained! With these elements, you’ll create a vibrant, memorable atmosphere that’ll have your guests raving long after the festivities are over. Let the carnival magic begin! 🎉