Posted in Celebrations, Kid's Crafts

Hats Off to the New Year

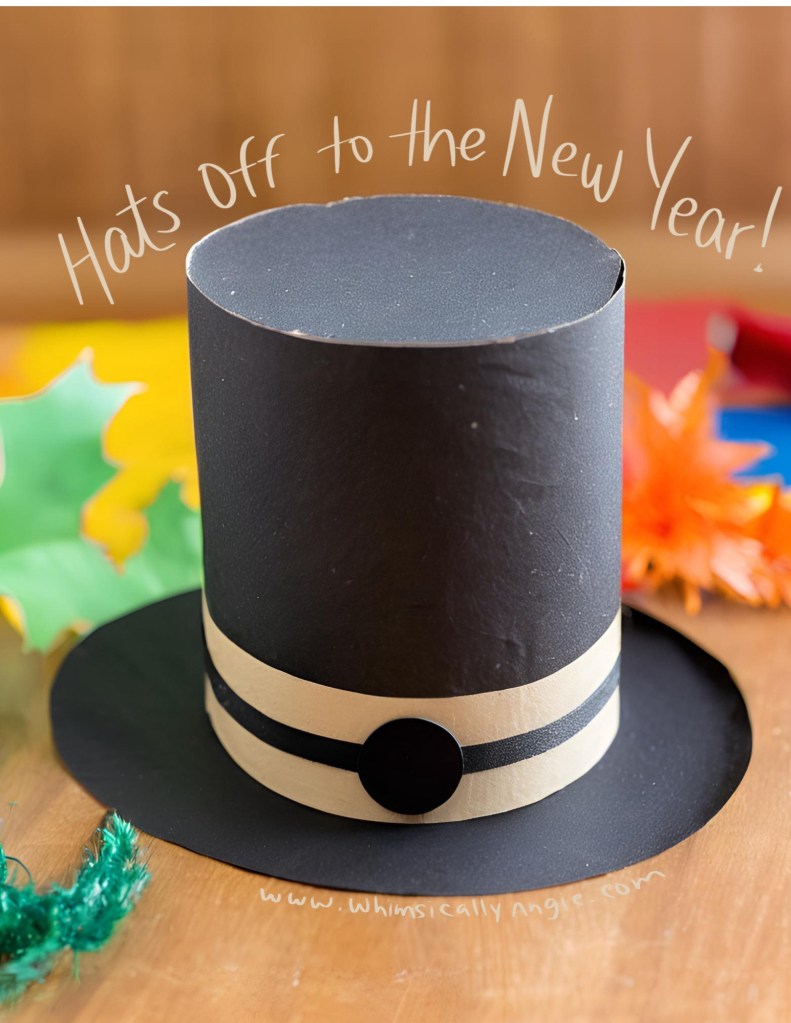
Looking for a fun, easy craft for kids to enjoy this New Year’s Eve? A DIY top hat made from two toilet paper rolls and some paper is the perfect way to get little hands busy while adding a festive touch to your celebration. Here’s how to make a fun, no-fuss top hat that kids will love to create!

What You’ll Need:

  • 2 toilet paper rolls
  • Colorful construction paper (black, gold, or any fun color!)
  • Scissors
  • Glue or tape
  • Decorative extras like stickers, sequins, or ribbons (optional)

Steps:

  1. Prepare the Hat Base: Start by taking one toilet paper roll—this will form the main part of your child’s top hat. If you want to make the hat a little smaller or more fitted, simply pinch the edges of the roll to adjust the size. Kids can help with this part, which is easy and fun.
  2. Create the Brim: Take the second toilet roll and cut it into two pieces, each about 1 inch wide. Flatten these pieces to form the brim of the hat. You can tape or glue them in a circle shape around the base of the first roll. This will give the hat a fun, wide-brimmed look.
  3. Wrap with Paper: Once the structure is in place, take the colorful construction paper and cut it to size. Wrap it around both the top and bottom of the rolls, covering the entire surface. Secure it with glue or tape. If you’re using black paper, this will give your hat a classic top-hat look!
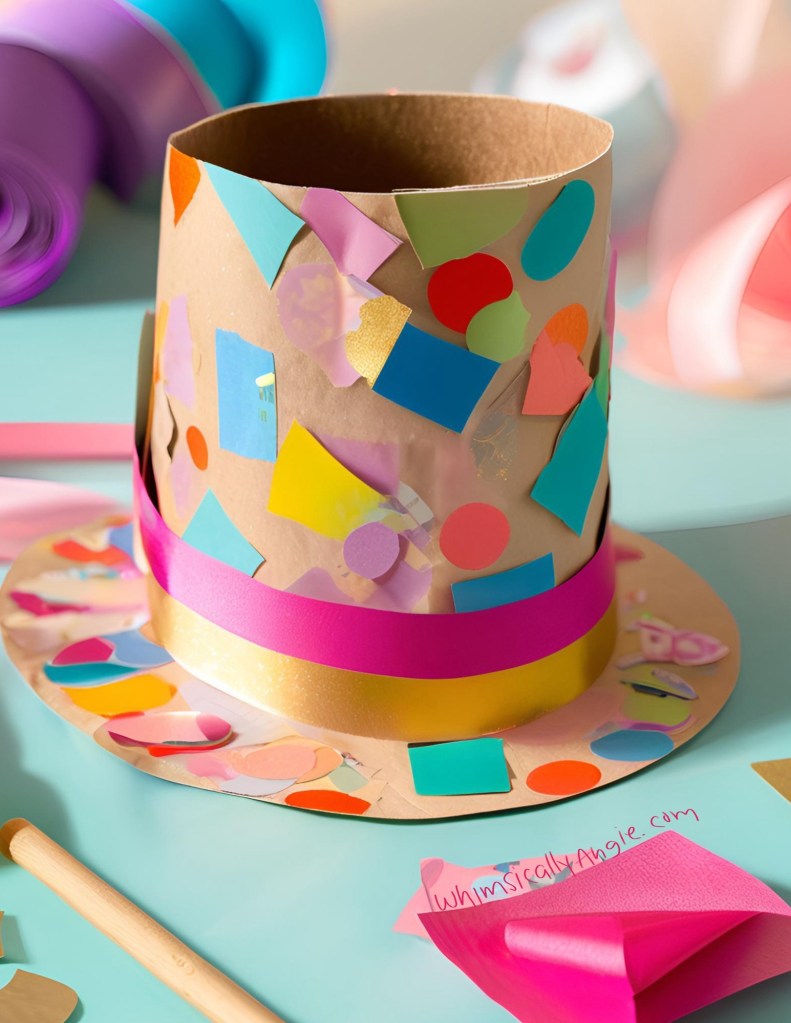
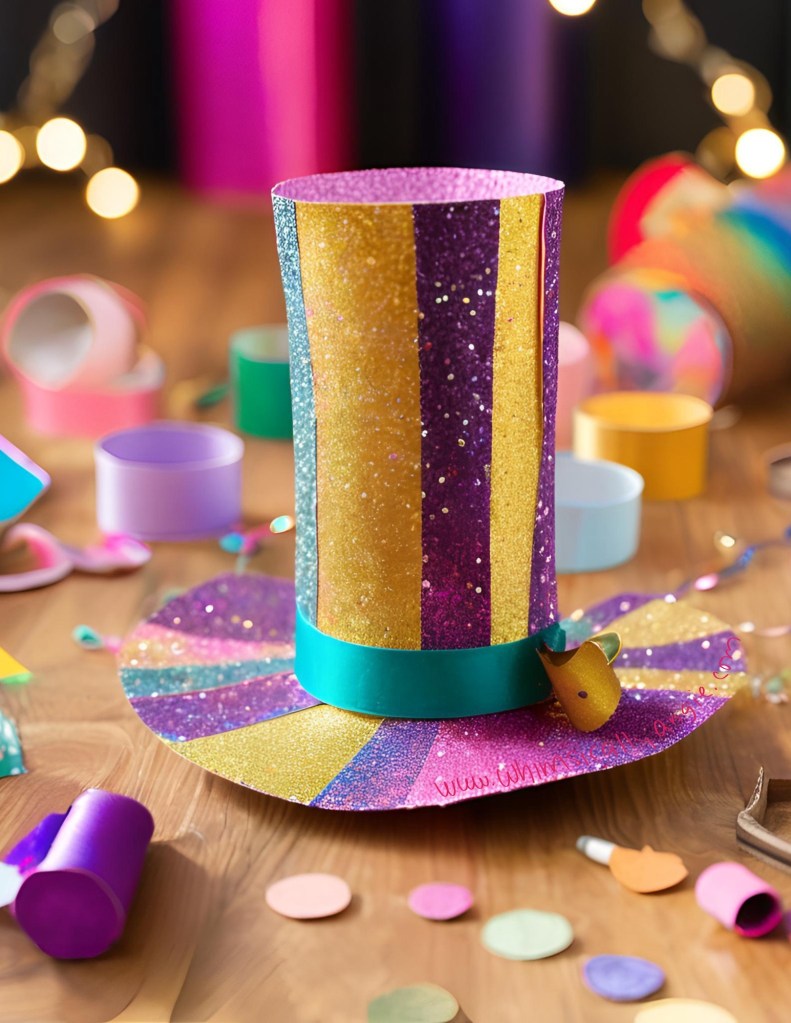
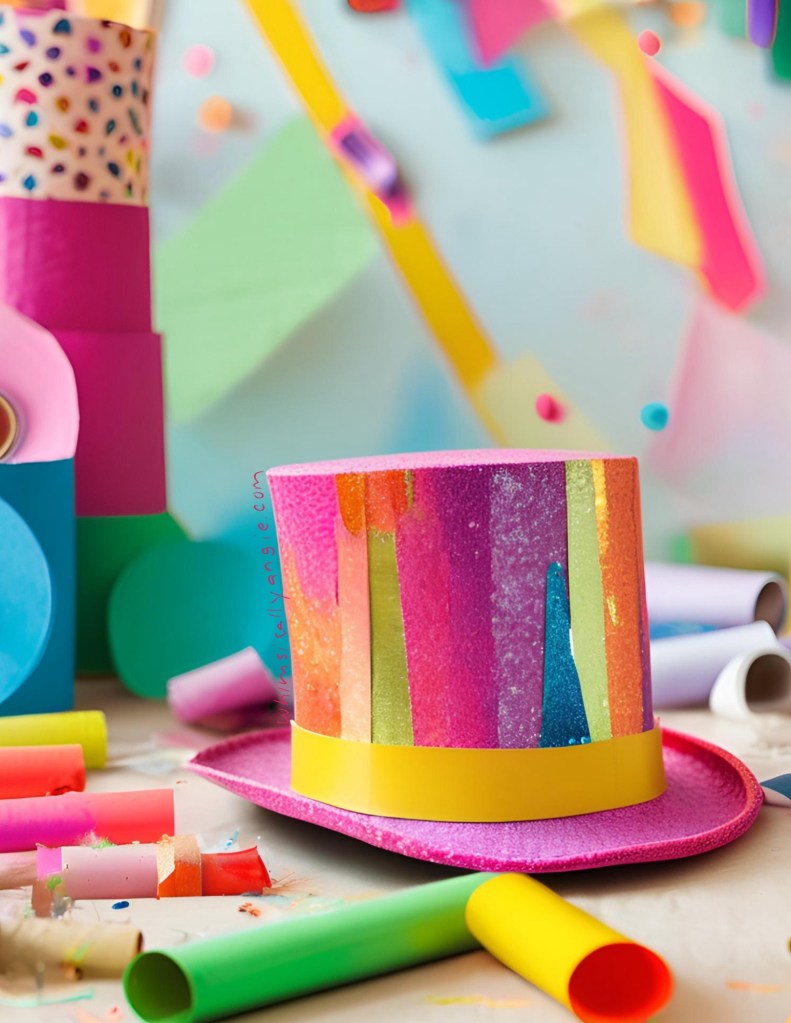
  4. Decorate: This is the best part! Let kids get creative with stickers, sequins, glitter, or even a ribbon to give their hats a New Year’s sparkle. You could also add little stars, fireworks, or “2025” written on the hat to mark the occasion.

Now, your little ones have their very own festive top hats to wear while ringing in the New Year! It’s a great craft that’s simple, fun, and perfect for kids of all ages. Happy crafting!

Posted in Celebrations, Kid's Crafts

Crafting a Shoe Box Altar for Día de los Muertos

Creating a Día de los Muertos altar doesn’t have to be a grand affair; a simple shoe box can serve as a heartfelt tribute to your loved ones. This compact altar can be a wonderful project for individuals, families, or even classrooms. Here’s a quick step-by-step guide to making your own shoe box altar.

What You’ll Need:

  • Shoe Box: A standard shoebox works well, but you can also use a small decorative box.
  • Paint or Decorative Paper: To personalize the outside of the box.
  • Photos of the Departed: Print or use small photos of your loved ones.
  • Candles: Tea lights or small battery-operated candles for safety.
  • Marigolds (Cempasúchil): Dried flowers or paper marigolds for decoration.
  • Sugar Skulls: Small decorative skulls, either made from sugar or crafted from paper or clay.
  • Small Personal Items: Tokens that represent the deceased’s interests or favorite things.
  • Food Offerings: Miniature food items or snacks (like candies) to honor them.
  • Craft Supplies: Glue, scissors, markers, and other materials for decorating.

Step 1: Prepare the Shoe Box

Start by cleaning your shoe box and removing any labels. If you want, you can paint the box or cover it with decorative paper to make it visually appealing. Bright colors are traditional and reflect the celebration’s spirit.

Step 2: Create the Base Layer

Line the inside of the box with colorful paper or fabric. This can represent the earth or the sky, depending on your choice of colors. You can use tissue paper, felt, or any decorative material you have on hand.

Step 3: Arrange the Photos

Select small photos of your loved ones and place them in the back of the box. You can use small stands or tape them directly to the back. This helps make the photos the focal point of your altar.

Step 4: Add Candles

Place small candles in front of the photos. If you’re using battery-operated tea lights, make sure they are securely positioned to prevent tipping over. If using real candles, ensure there is enough space to prevent any fire hazards.

Step 5: Decorate with Marigolds

Add marigold flowers around the photos and candles. You can use fresh, dried, or even paper marigolds. Scatter the petals or arrange them in a decorative way to add color and life. We made these with tissue paper and our Cricut Joy Xtra.

Step 6: Include Personal Items and Offerings

Place small personal items or tokens that represent the departed—like a favorite book, hobby item, or a small toy for children. Also, include food offerings like candies or mini pastries to honor their memory.

Step 7: Incorporate Sugar Skulls

Add a few sugar skulls or decorative skulls around the altar. They can be placed near the candles or amongst the flowers to enhance the festive look.

Step 8: Final Touches

Step back and evaluate your altar. You might want to add some additional decorations like papel picado, small mirrors, or colorful drawings to enhance the visual appeal. Personal touches can make the altar even more special.

Step 9: Celebrate and Reflect

On Día de los Muertos, take some time to reflect on the lives of those you’re honoring. Light the candles, share stories, and enjoy traditional snacks as you remember the joy and love they brought into your life.

Conclusion

A shoe box altar is a meaningful way to participate in Día de los Muertos, allowing you to express love and remembrance in a compact and creative format. Whether you’re working alone or with family, this project can bring joy and connection as you celebrate the lives of those who have passed. Happy Día de los Muertos!

Posted in Kid's Crafts, Printables

FREE Printable Paper Alebrije Jaguar Mask

Looking for a fun and creative activity to celebrate Mexican culture? My FREE Printable Paper Alebrije Jaguar Maskis the perfect project for anyone who loves crafts! Alebrijes are vibrant, fantastical creatures that blend imagination with traditional Mexican artistry. This printable mask offers a delightful crafting experience and an opportunity to learn about the rich heritage behind these colorful creations. Download your mask today and add a splash of creativity to your next celebration or solo project!

In addition to being a fun crafting project, this printable jaguar mask is designed for coloring! Grab your favorite markers, crayons, or colored pencils and let your creativity run wild. Personalize your mask with bright colors and unique patterns, just like the traditional alebrijes. Not only will you enjoy the process of decorating, but you’ll also create a one-of-a-kind piece that showcases your artistic flair. Whether for a festive event, Halloween, or just for fun, this customizable mask is sure to impress!

To assemble your Printable Paper Mask, follow these simple instructions:

  1. Cut Out the Mask: Carefully cut along the outlines of the mask and its pieces. Take your time to ensure clean edges for a polished look.
  2. Glue Pieces Together: Using a glue stick or craft glue, attach the different parts of the mask as indicated on the template. Make sure everything is securely fastened.
  3. Add Ribbon: Once the glue has dried, use hot glue to attach a ribbon to each side of the mask. This will allow you to wear it comfortably. Be cautious when using hot glue to avoid burns.
  4. Let It Dry: Allow everything to dry completely before wearing your colorful creation!

Now you’re ready to show off your beautiful jaguar mask!