The holiday season is the perfect time to engage kids in activities that teach important values like kindness, gratitude, and creativity. One of the most fun and memorable ways to do this is by creating your own advent calendar filled with thoughtful, hands-on activities for the family. I started making these advent calendars a couple of years ago, and every year I add a little something special to make it even more meaningful.
My Advent Calendar Journey
I first began this craft in 2022, planning to make individual calendars for each of my kids. But life had other plans, and I didn’t quite finish them. Last year, I was still working through grief after the loss of my dad, so I ended up keeping it simple — just gluing the pieces together and displaying it as a basic version of what I had envisioned.
But this year? I’m so excited to share that I’ve completed my advent calendar project and made it better than ever! I even created printable inserts with a list of 24 thoughtful activity ideas to inspire family fun during the holiday season. If you’re looking to craft your own meaningful advent calendar, here’s a step-by-step guide to get you started!
Materials You’ll Need:
- Cardboard (for the base of the calendar)
- Hot glue gun & glue sticks (for assembly)
- Box cutter (for cutting out shapes)
- Cutting mat (to protect your work surface)
- White Sharpie Creative Marker (for adding details)
Step-by-Step Instructions:
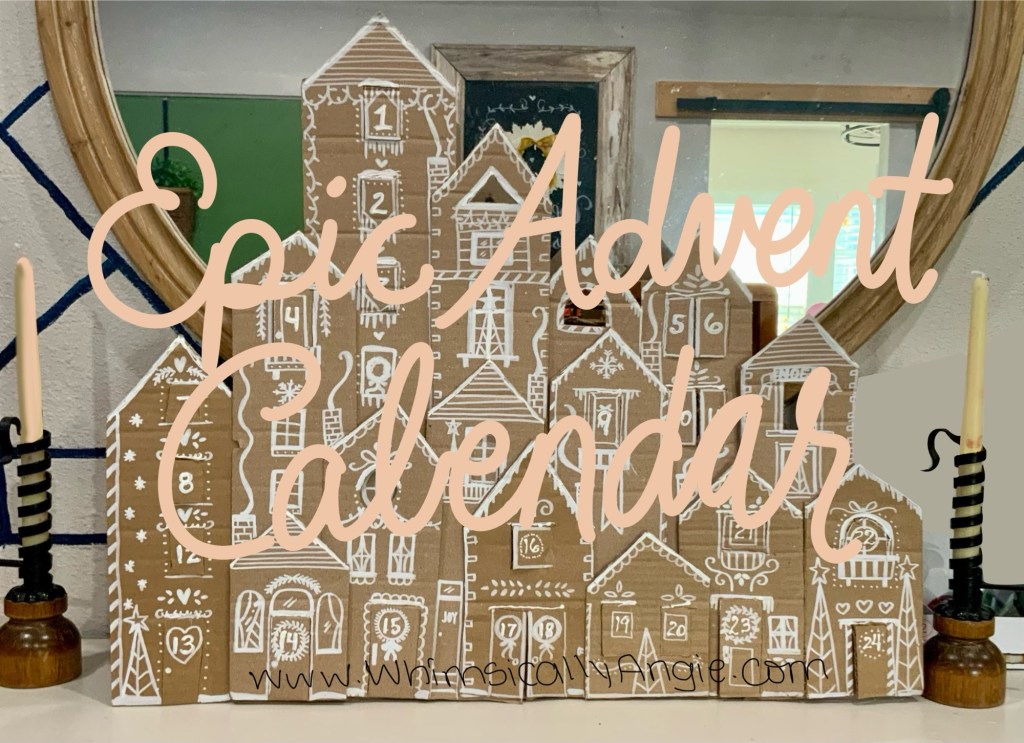
- Cut the Cardboard: Start by cutting 15 strips of cardboard, each 4-5 inches wide. The height of these strips will vary from 6 inches to 22 inches, depending on how tall you want your advent calendar village to be. These strips will form the walls of your little cardboard village.
- Shape the Roofs: For each piece of cardboard, cut out the roof shapes to give your village a house-like look. You can make the roofs as simple or as intricate as you like.
- Add Windows and Doors: The next step is to create a minimum of 24 cutouts for windows and doors on your village houses. Most of these will be the “surprises” that hold your daily activity cards. Make sure to place the doors and windows thoughtfully — you’ll want to have them evenly spaced across your village.
- Dry Fit and Assemble: Before gluing everything together, dry fit the cardboard pieces to make sure everything aligns the way you want it. Once you’re happy with the layout, start gluing the pieces together using your hot glue gun. Be sure to leave the backs of the windows and doors open so you can insert the activity cards.
- Final Touches: Once your village is assembled, add finishing touches like a bit of decoration with your paint marker. You can draw lines, patterns, numbers, or add little details to the cardboard houses to make them feel even more festive!
Thoughtful Advent Activities for the Family
The best part about this DIY advent calendar is that it’s filled with meaningful activities to do together as a family. I’ve included a list of thoughtful ideas that promote gratitude, kindness, and creativity.
These activities don’t require a lot of time or money but are a great way to slow down and savor the season with your kids.
FULL LIST + Printable Cards HERE
Final Thoughts
Creating an advent calendar for your kids can be a fun and meaningful holiday tradition that helps teach important values while also sparking excitement and joy as you count down to Christmas. Whether you go all out with a creative DIY village like I did or keep it simple, the goal is to make memories and share quality time together.
What activities would you include in your advent calendar? Let me know in the comments — I’d love to hear your ideas!
Happy holidays and happy crafting! 🎄