Decorate this Free Printable Template any way you want. Though, I designed it with Dia de Muertos in mind, it can easily be used for a fun Halloween accent, too!

Decorate this Free Printable Template any way you want. Though, I designed it with Dia de Muertos in mind, it can easily be used for a fun Halloween accent, too!
Creating a Día de los Muertos altar doesn’t have to be a grand affair; a simple shoe box can serve as a heartfelt tribute to your loved ones. This compact altar can be a wonderful project for individuals, families, or even classrooms. Here’s a quick step-by-step guide to making your own shoe box altar.

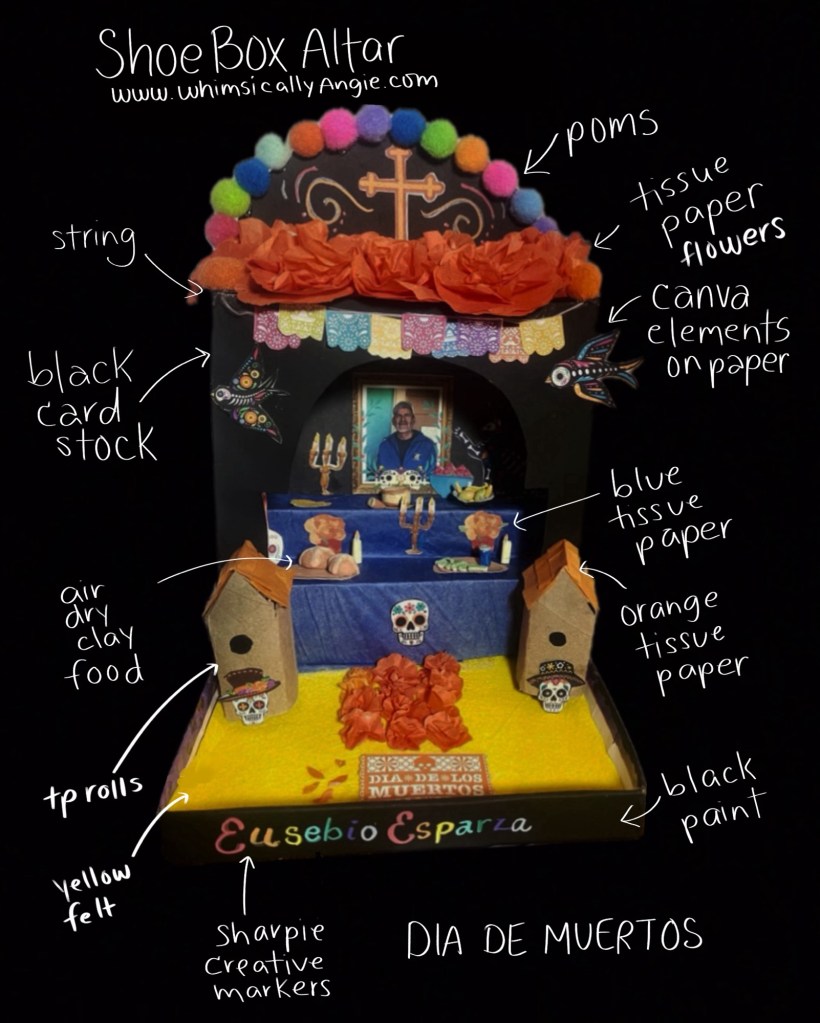
Start by cleaning your shoe box and removing any labels. If you want, you can paint the box or cover it with decorative paper to make it visually appealing. Bright colors are traditional and reflect the celebration’s spirit.
Line the inside of the box with colorful paper or fabric. This can represent the earth or the sky, depending on your choice of colors. You can use tissue paper, felt, or any decorative material you have on hand.
Select small photos of your loved ones and place them in the back of the box. You can use small stands or tape them directly to the back. This helps make the photos the focal point of your altar.
Place small candles in front of the photos. If you’re using battery-operated tea lights, make sure they are securely positioned to prevent tipping over. If using real candles, ensure there is enough space to prevent any fire hazards.
Add marigold flowers around the photos and candles. You can use fresh, dried, or even paper marigolds. Scatter the petals or arrange them in a decorative way to add color and life. We made these with tissue paper and our Cricut Joy Xtra.
Place small personal items or tokens that represent the departed—like a favorite book, hobby item, or a small toy for children. Also, include food offerings like candies or mini pastries to honor their memory.
Add a few sugar skulls or decorative skulls around the altar. They can be placed near the candles or amongst the flowers to enhance the festive look.
Step back and evaluate your altar. You might want to add some additional decorations like papel picado, small mirrors, or colorful drawings to enhance the visual appeal. Personal touches can make the altar even more special.
On Día de los Muertos, take some time to reflect on the lives of those you’re honoring. Light the candles, share stories, and enjoy traditional snacks as you remember the joy and love they brought into your life.
A shoe box altar is a meaningful way to participate in Día de los Muertos, allowing you to express love and remembrance in a compact and creative format. Whether you’re working alone or with family, this project can bring joy and connection as you celebrate the lives of those who have passed. Happy Día de los Muertos!
Celebrate National Black Cat Day with some fun and spooky crafts! With Halloween just around the corner, why not combine the charm of black cats with festive DIY projects? In this post, I’m sharing five creative black cat crafts that not only pay homage to these mysterious creatures but also add a touch of Halloween spirit to your home. Let’s get crafting!
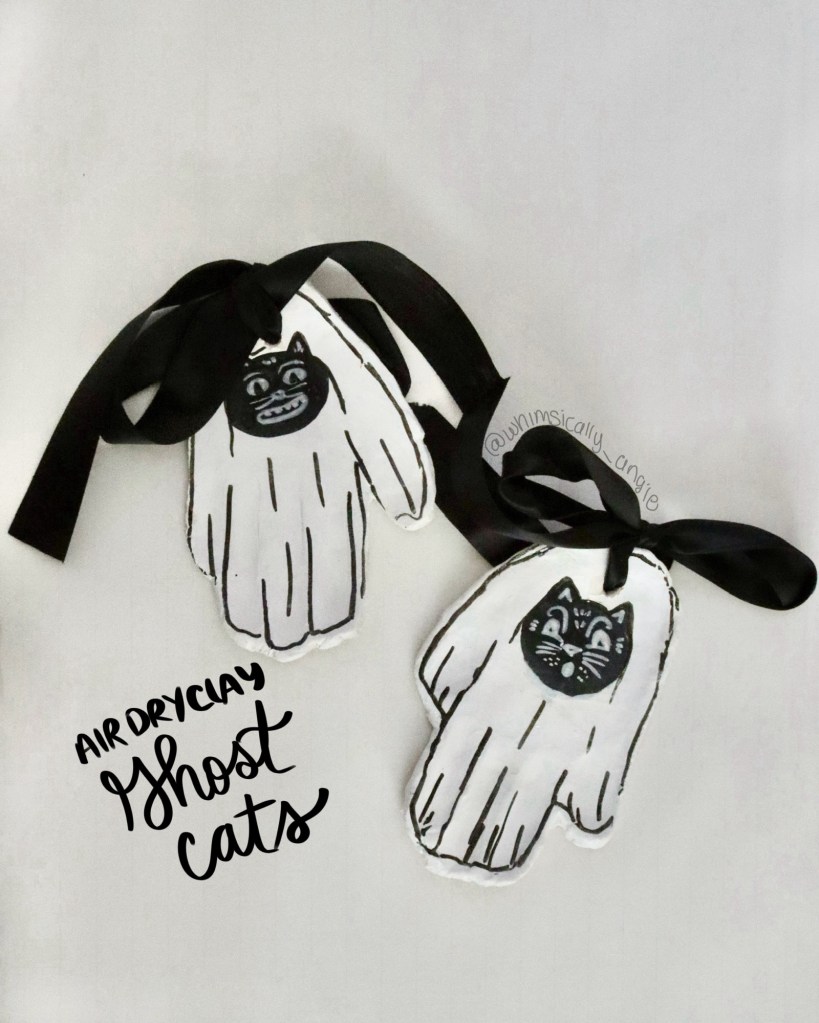
Making an air dry handprint ghost is a delightful and easy craft! Start by rolling out some white air dry clay and pressing your child’s hand into it to create a handprint. Once it’s shaped, let it dry completely. Once dry, it’s time to get creative! Paint the top of the handprint with a friendly cat face—big eyes, pointy ears, and a cute little nose will bring your ghost to life. For an extra touch, you can add some playful details like a tiny collar or whiskers. These adorable handprint ghosts make perfect Halloween decorations and are a great way to capture those little handprints as a keepsake!
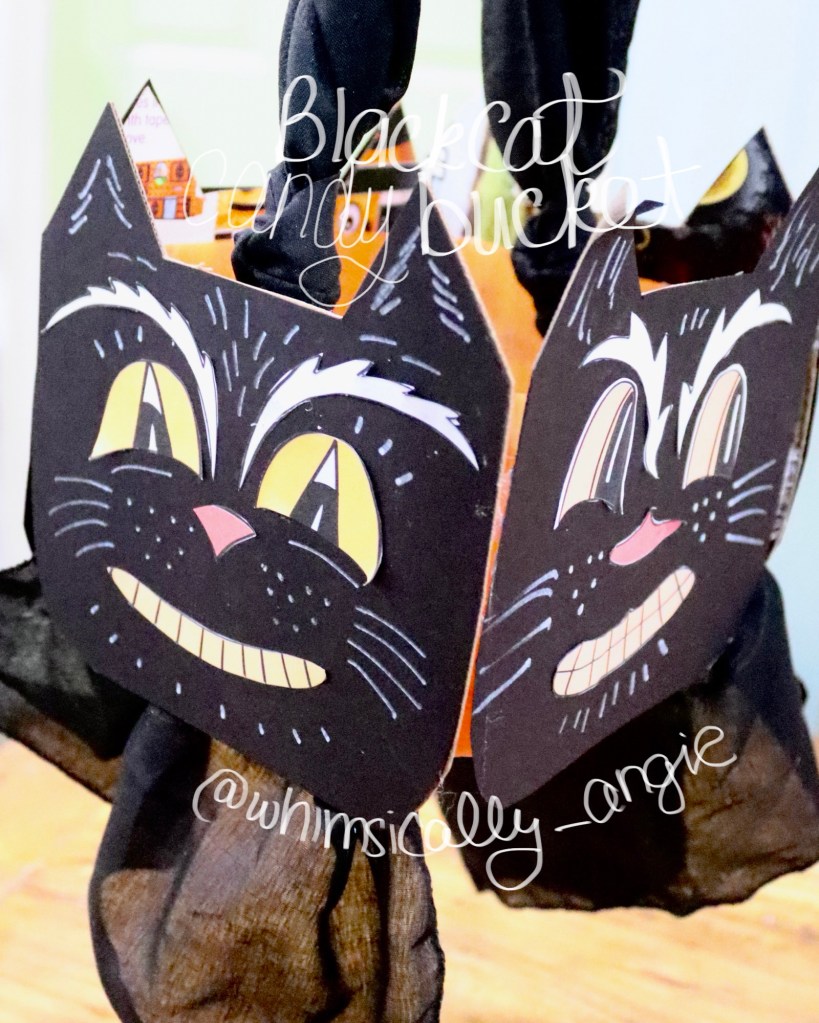
Get ready to unleash your creativity with this vintage-inspired cat-shaped candy bucket project! Perfect for Halloween or any festive occasion, this charming design combines whimsy and nostalgia. With a few simple materials and steps, you’ll create a delightful container that’s not only functional but also a playful decoration. Let’s dive into the fun of crafting a unique piece that will add a touch of charm to your celebrations. FREE PRINTABLE HERE
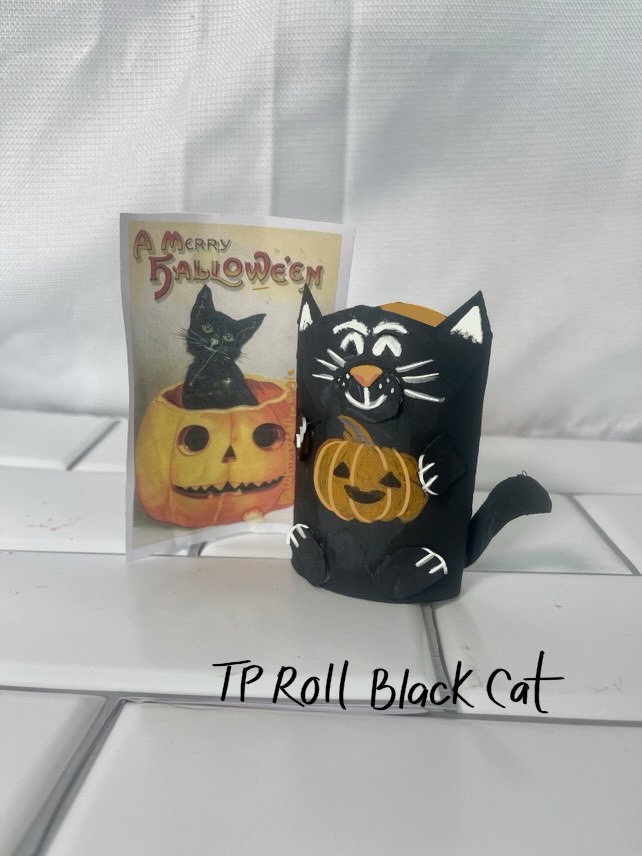
Making a black cat cutout from a toilet paper roll is super easy and fun! Start by cutting the top of the roll into ear shapes—just two triangles on either side will do the trick. Next, take those extra pieces you cut off and shape them into little feet, snout, and a tail to give your cat some 3D flair. You can even add some googly eyes or draw a cute face to bring it to life. Just grab some black paint or markers to color it in, and voilà! You’ve got yourself an adorable little cat that’s perfect for Halloween or just for fun!

Making a cute black cat cutout with an accordion-pleated fan shape is a blast! Start by taking a piece of black paper and folding it back and forth like an accordion. Once you’ve got it fully pleated, fold each end to form a fan shape. Glue or staple the ends together . Now for the fun part: grab some colorful paper to cut out eyes, a nose, and whiskers! You can glue those on to create your cat’s face. Add some ears at the top, and maybe even a stick to create a festive paper fan.
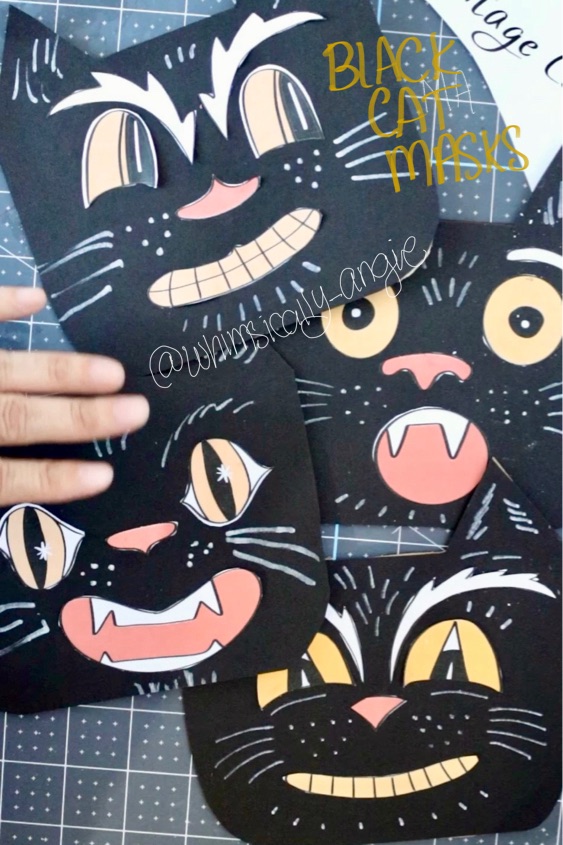
Making a black cat mask is super easy and fun! Grab some black cardstock and print out those cute face features—like whiskers, eyes, and a nose—that you can FIND HERE for free. Cut everything out, then just glue the face parts onto the cardstock to create your cat’s face. Once that’s all set, glue a popsicle stick to the bottom to create a handheld mask. Now you’re all set to be the coolest kitty at any party!
In conclusion, these five black cat crafts are perfect for celebrating the feline spirit of Halloween and National Black Cat Day. Each project is simple and uses accessible materials, making them ideal for both kids and adults.
So gather your supplies and dive into the world of black cat crafting; it’s a purr-fect way to unleash your imagination and embrace the charm of these beloved creatures!
