Materials You’ll Need:
- One 4×4 wooden post (18-36 inches long, depending on your preference)
- Tapered candles
- Saw
- Sandpaper
- Drill with a spade or paddle bit (slightly larger in diameter than your tapered candles)
- A spade wood drill bit to fit your candles
- Ruler or measuring tape
- Pencil
- Two contrasting paint colors (for the checkered pattern)
- Paintbrushes
- Painter’s tape
- Clear sealer (optional)
- Protective gear (gloves and safety glasses)
Instructions:
1. Safety First:
- Ensure your work area is well-ventilated and set up all your materials and tools. Wear appropriate protective gear.
2. Measure and Cut:
- Decide the length you want for your candleholder (between 18-36 inches) and mark it on the 4×4 wooden post with a pencil.
3. Cut the Wooden Post:
- Use a saw to cut the 4×4 wooden post at the marked measurement. This will be the main body of your candleholder.
4. Sand the Edges:
- Use sandpaper to smooth the cut edges of the wooden post. You can also sand the corners and sides to give it a more rustic appearance.
5. Create Candle Holes:
- Find the nicest side of the wood for the top of your candleholder.
- Measure the diameter of your tapered candles. You don’t want too big of a hole because you don’t want your candles to lean. We used a 7/8” bit for our candles.
- Decide where you want to place your tapered candles on the wooden post. Using a pencil, measure along the length of the wood, drawing a line every 1 1/2” – 2” to mark the center of the candle holes.
- Then, measure along the width of the candle, draw three evenly spaced lines along the whole length of the board to mark the rows where the candles will go.
- Draw an X where the vertical and horizontal lines meet, designating where you will put your candles.
- Use the drill with the appropriate bit to create the candle holes at the spots marked with an X. Drill each hole to a depth that allows the tapered candles to stand securely (approximately 1”).
- Make sure to get out all the wood shavings. Then give everything a few good passes with the sanding block just to smooth out any splinter hazards
6. Paint the Base Color:
- Choose one of your contrasting paint colors as the base color. Paint the entire wooden post in this color. Allow it to dry completely.
7. Apply Painter’s Tape for the Checkered Pattern:
- To achieve the perfect checkered pattern, measure the width and height of your wooden post. Divide each dimension by the size of the squares you want. For example, if you have a 4×4 post and want 2-inch squares, you’ll need 2 rows and 2 columns.
- Using a ruler, measure and mark the spots where you want to place painter’s tape to create the checkered pattern. Apply painter’s tape vertically and horizontally to create the grid for the pattern. Make sure the tape is securely pressed down to create clean lines.
8. Paint the Checkered Pattern:
- Use the second contrasting paint color to paint the alternating squares not covered by the painter’s tape. Paint within the taped-off sections to create the checkered pattern. Allow it to dry.
9. Remove Painter’s Tape:
- Carefully remove the painter’s tape while the paint is still slightly wet to reveal the perfect checkered pattern. Allow the paint to dry completely.
10. Optional: Seal the Paint (if desired): – To protect the paint and add durability to your candleholder, you can apply a clear sealer according to the manufacturer’s instructions. Allow it to dry completely.
11. Insert Tapered Candles: – Insert your tapered candles into the holes you created. Make sure they fit securely and stand upright.
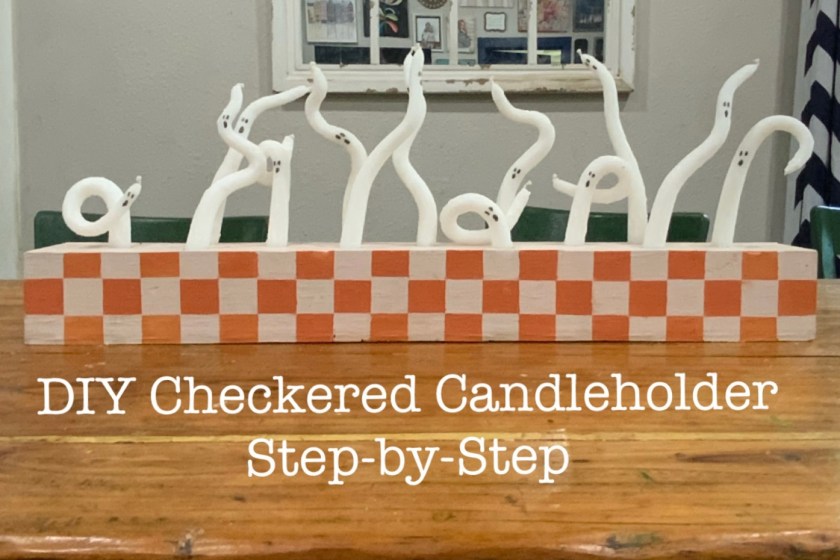
Your candleholder for tapered candles with the perfect checkered pattern is now complete! It’s a wonderful addition to your fall decor, creating a warm and cozy ambiance for your home.
