Do you need a fun idea for a joint birthday party? Consider throwing a Carnival Birthday Bash.
Heads up! This post contains affiliate links. Thanks for your support!
A carnival theme is a fantastic choice for a joint birthday party for several reasons:
- Everyone Loves Carnivals
- Seriously, who doesn’t love a carnival? It’s bright, fun, and perfect for both boys and girls.
- Variety of Activities
- You’ve got games, face painting, and maybe even a magic show. There’s something for everyone to enjoy!
- Super Interactive
- Everyone gets to join in on the fun! Games and activities get people talking and laughing—perfect for making new friends.
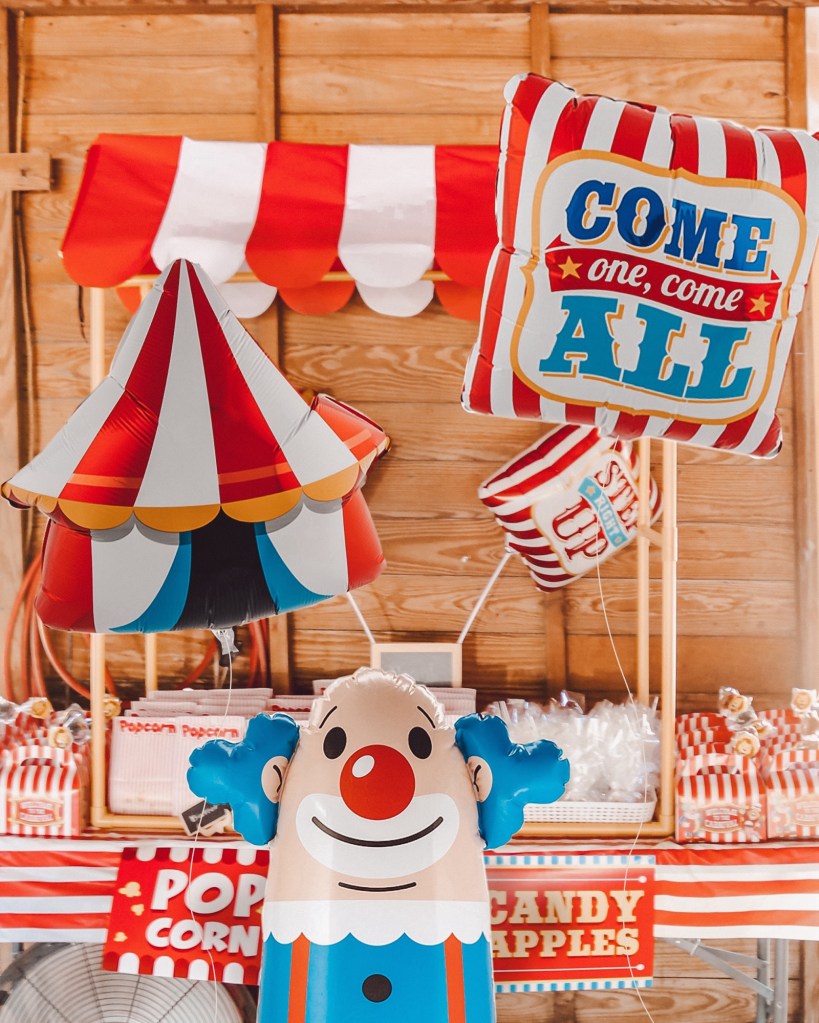
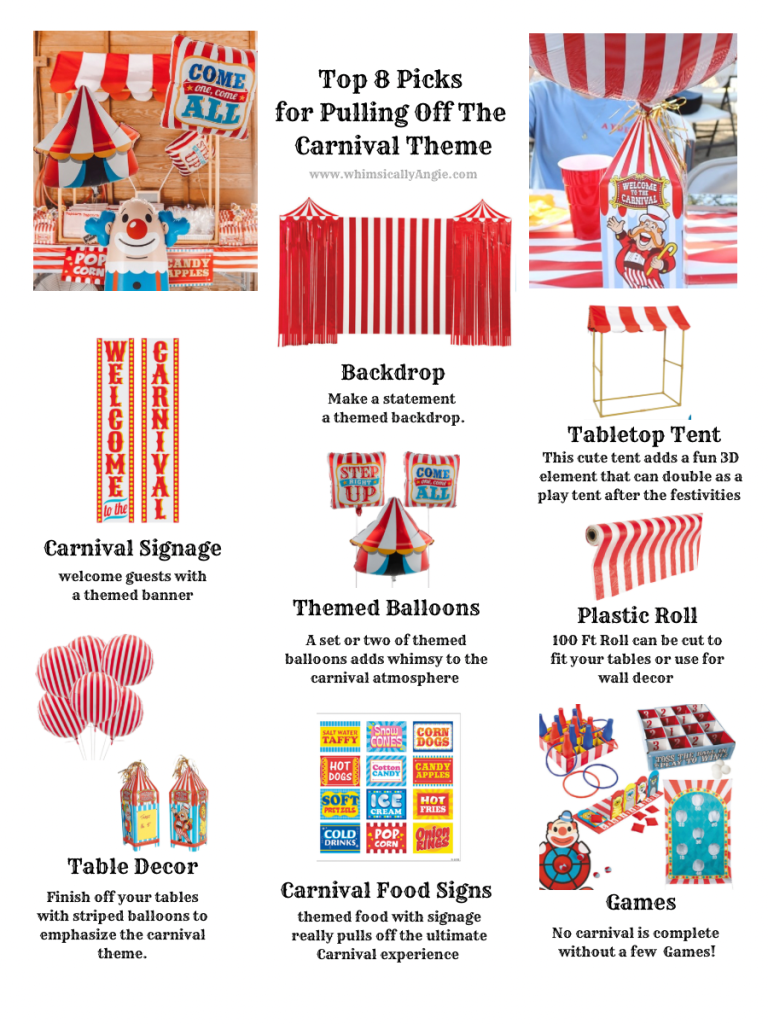
- Epic Decor
- Think colorful banners, balloons, and lights. It creates such a vibrant vibe that screams party!
- Fun Food
- Cotton candy, popcorn, and hot dogs? Yes, please! It’s the kind of food that makes you feel like a kid again. Carnival themed snacks are easy to make AND easy on the budget.
- Endless Customization
- You can mix in your favorite characters or themes. It’s totally flexible to fit both of your personalities.
- Memorable Moments
- The excitement of carnival games and activities creates lasting memories, making the celebration more special for both birthday kids.
- Easy to Plan
- Oriental Trading Co. has many ready-made carnival supplies and ideas available, so planning a carnival-themed party can be straightforward and fun.
- Teamwork Makes the Dream Work
- Group games and activities are perfect for getting everyone involved and building new friendships.
- Perfect for Any Size
- Whether you want a chill get-together or a huge party, a carnival theme can totally work for whatever you’re planning.
If you’re throwing a carnival-themed birthday party, Oriental Trading Company is the way to go. They offer tons of options, from decorations to games, all at affordable prices. And, with everything in one place, you can avoid the hassle of running around town. Overall, using Oriental Trading makes carnival party planning a breeze!🎪
🎈 Use code YAY for free shipping on orders $25 🎈


